A note on Covid19 and what it means for our operations:
In light of the recent surge in Coronavirus cases, we are taking extra precaution to protect our clients and ourselves. This means we try to accomplish as much as possible virtually by conducting meetings through video whenever possible, and minimize the need of in person meetings.
When in person meetings are necessary, we will wear masks and physically distance where applicable.
As of mid 2023, lead times have stabilized for the most part (yay no more 4-6 months wait like 2022), and we are back to the more typical 7-9 weeks lead time.
At MTKC, we focus on special ordered cabinets. Our typical kitchen cabinets start in the $20,000 range for small kitchens (cabinets only, no installation). With most of our average size kitchens being in the $30,000 – $50,000 range. Bathroom cabinets typically start in the $1,000 – $2,000 range for smaller single sink units (2-3 feet). Larger single sink vanities or smaller double sink vanities (roughly 5-6 feet long) will vary in the $3,000 – $4,000 range depending on design and material selection. Each project is unique and different, this general price range is being provided as a high level estimate, we will provide more accurate pricing based on your specific needs.
Designing your precise kitchen, with material selection and full 3d color rendering is a multi-day process (sometimes weeks depending on amount of revisions). Therefore in the interest of time, we hope to provide a ballpark estimate for your hiring consideration before beginning the formal design process. To get started, we ask that you submit the following:
With this information, we would be able to provide a ballpark estimate.
Time needed: 20 minutes.
Instructions are written for a kitchen remodel, but feel free to adapt this for bathrooms and other rooms of the home, such as study room, fireplace, etc.
Begin by sketching your wall configuration like a floor plan view (imagine you were looking down from the top, like a bird’s eye view). Note the location of the windows, doors, and hallway entrances. This gives us an idea of available wall spaces for cabinets. 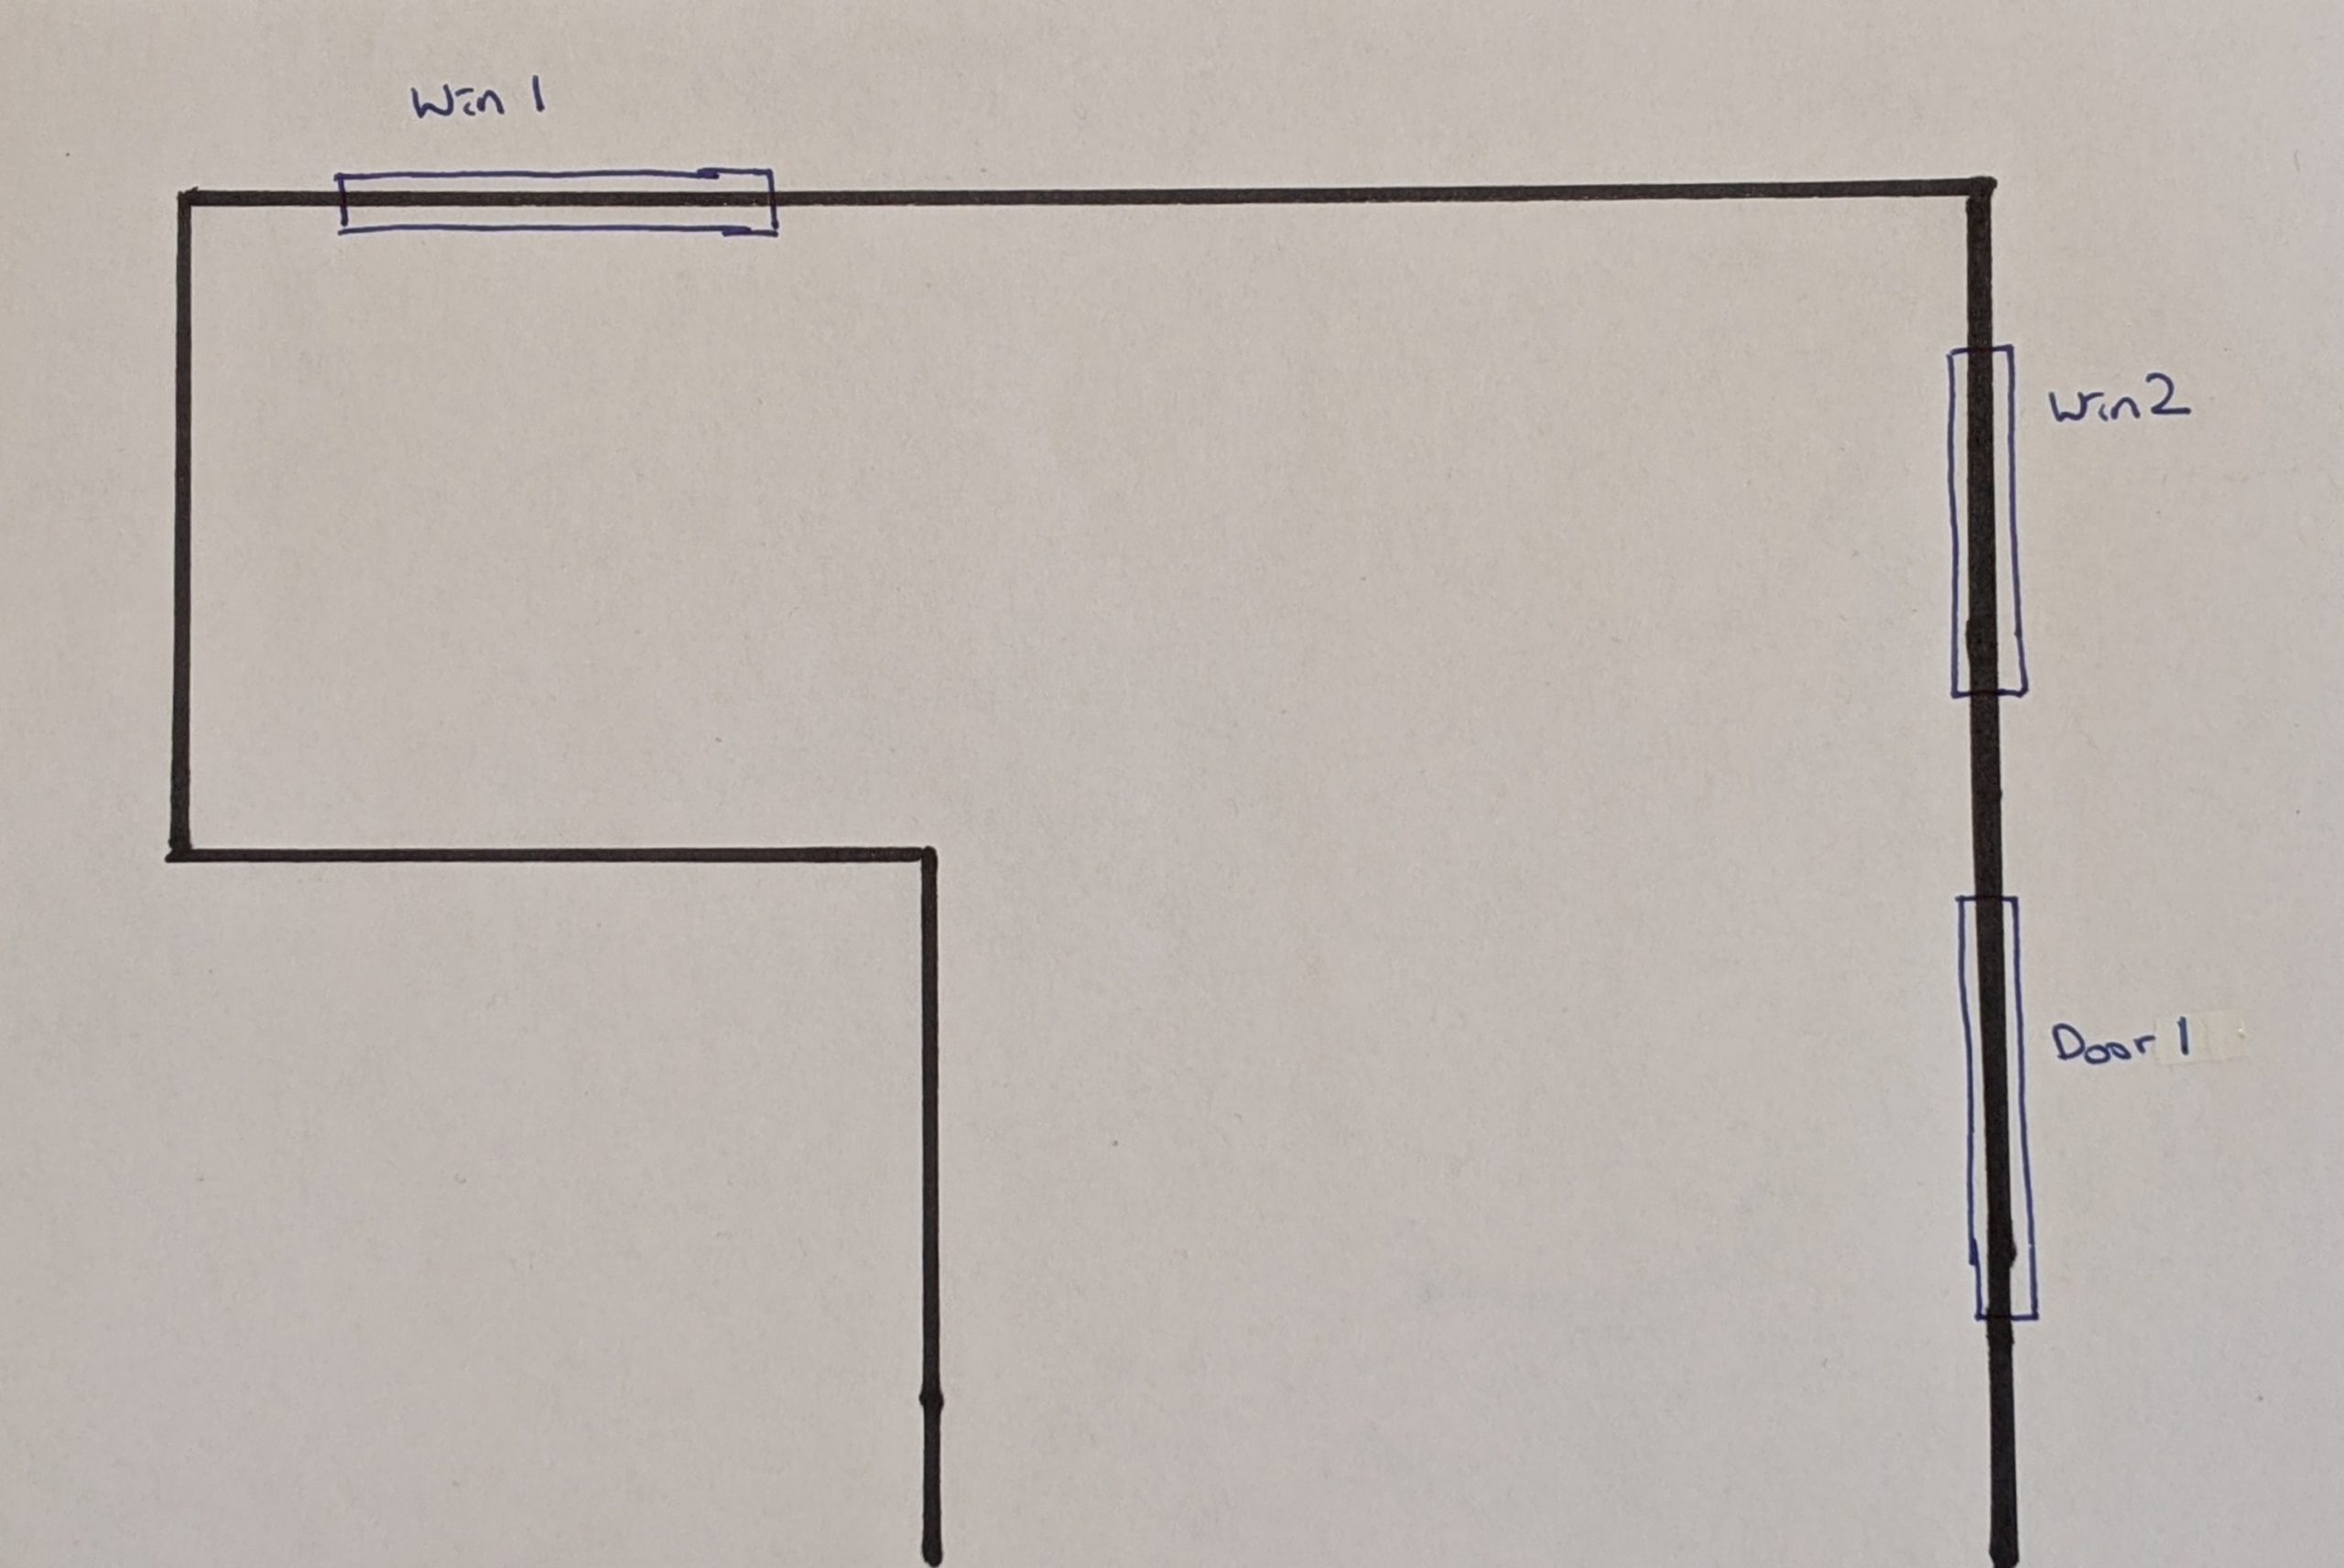
Pro-tip: label your windows and doors for easy communication, such as window1, window2. We tend to pick a spot for the first window, and continue clockwise. But feel free to label them anything you want as long as it makes sense to you, say “wall-of-faces”, “window-to-my-heart”, “doorway-to-hell”, or “stairway-to-heaven”? Okay just kidding, I’m lame. =P But hey, you’re reading =]
After noting the door opening, hallway entrance, and windows on the plan, let’s fill in the measurements. I usually grab the interior dimensions of a window, and then note the trim size on the side, because you can always change the size of your window and door trim during a remodel, but at least we’d know how big the window is, and where it is located on the wall. 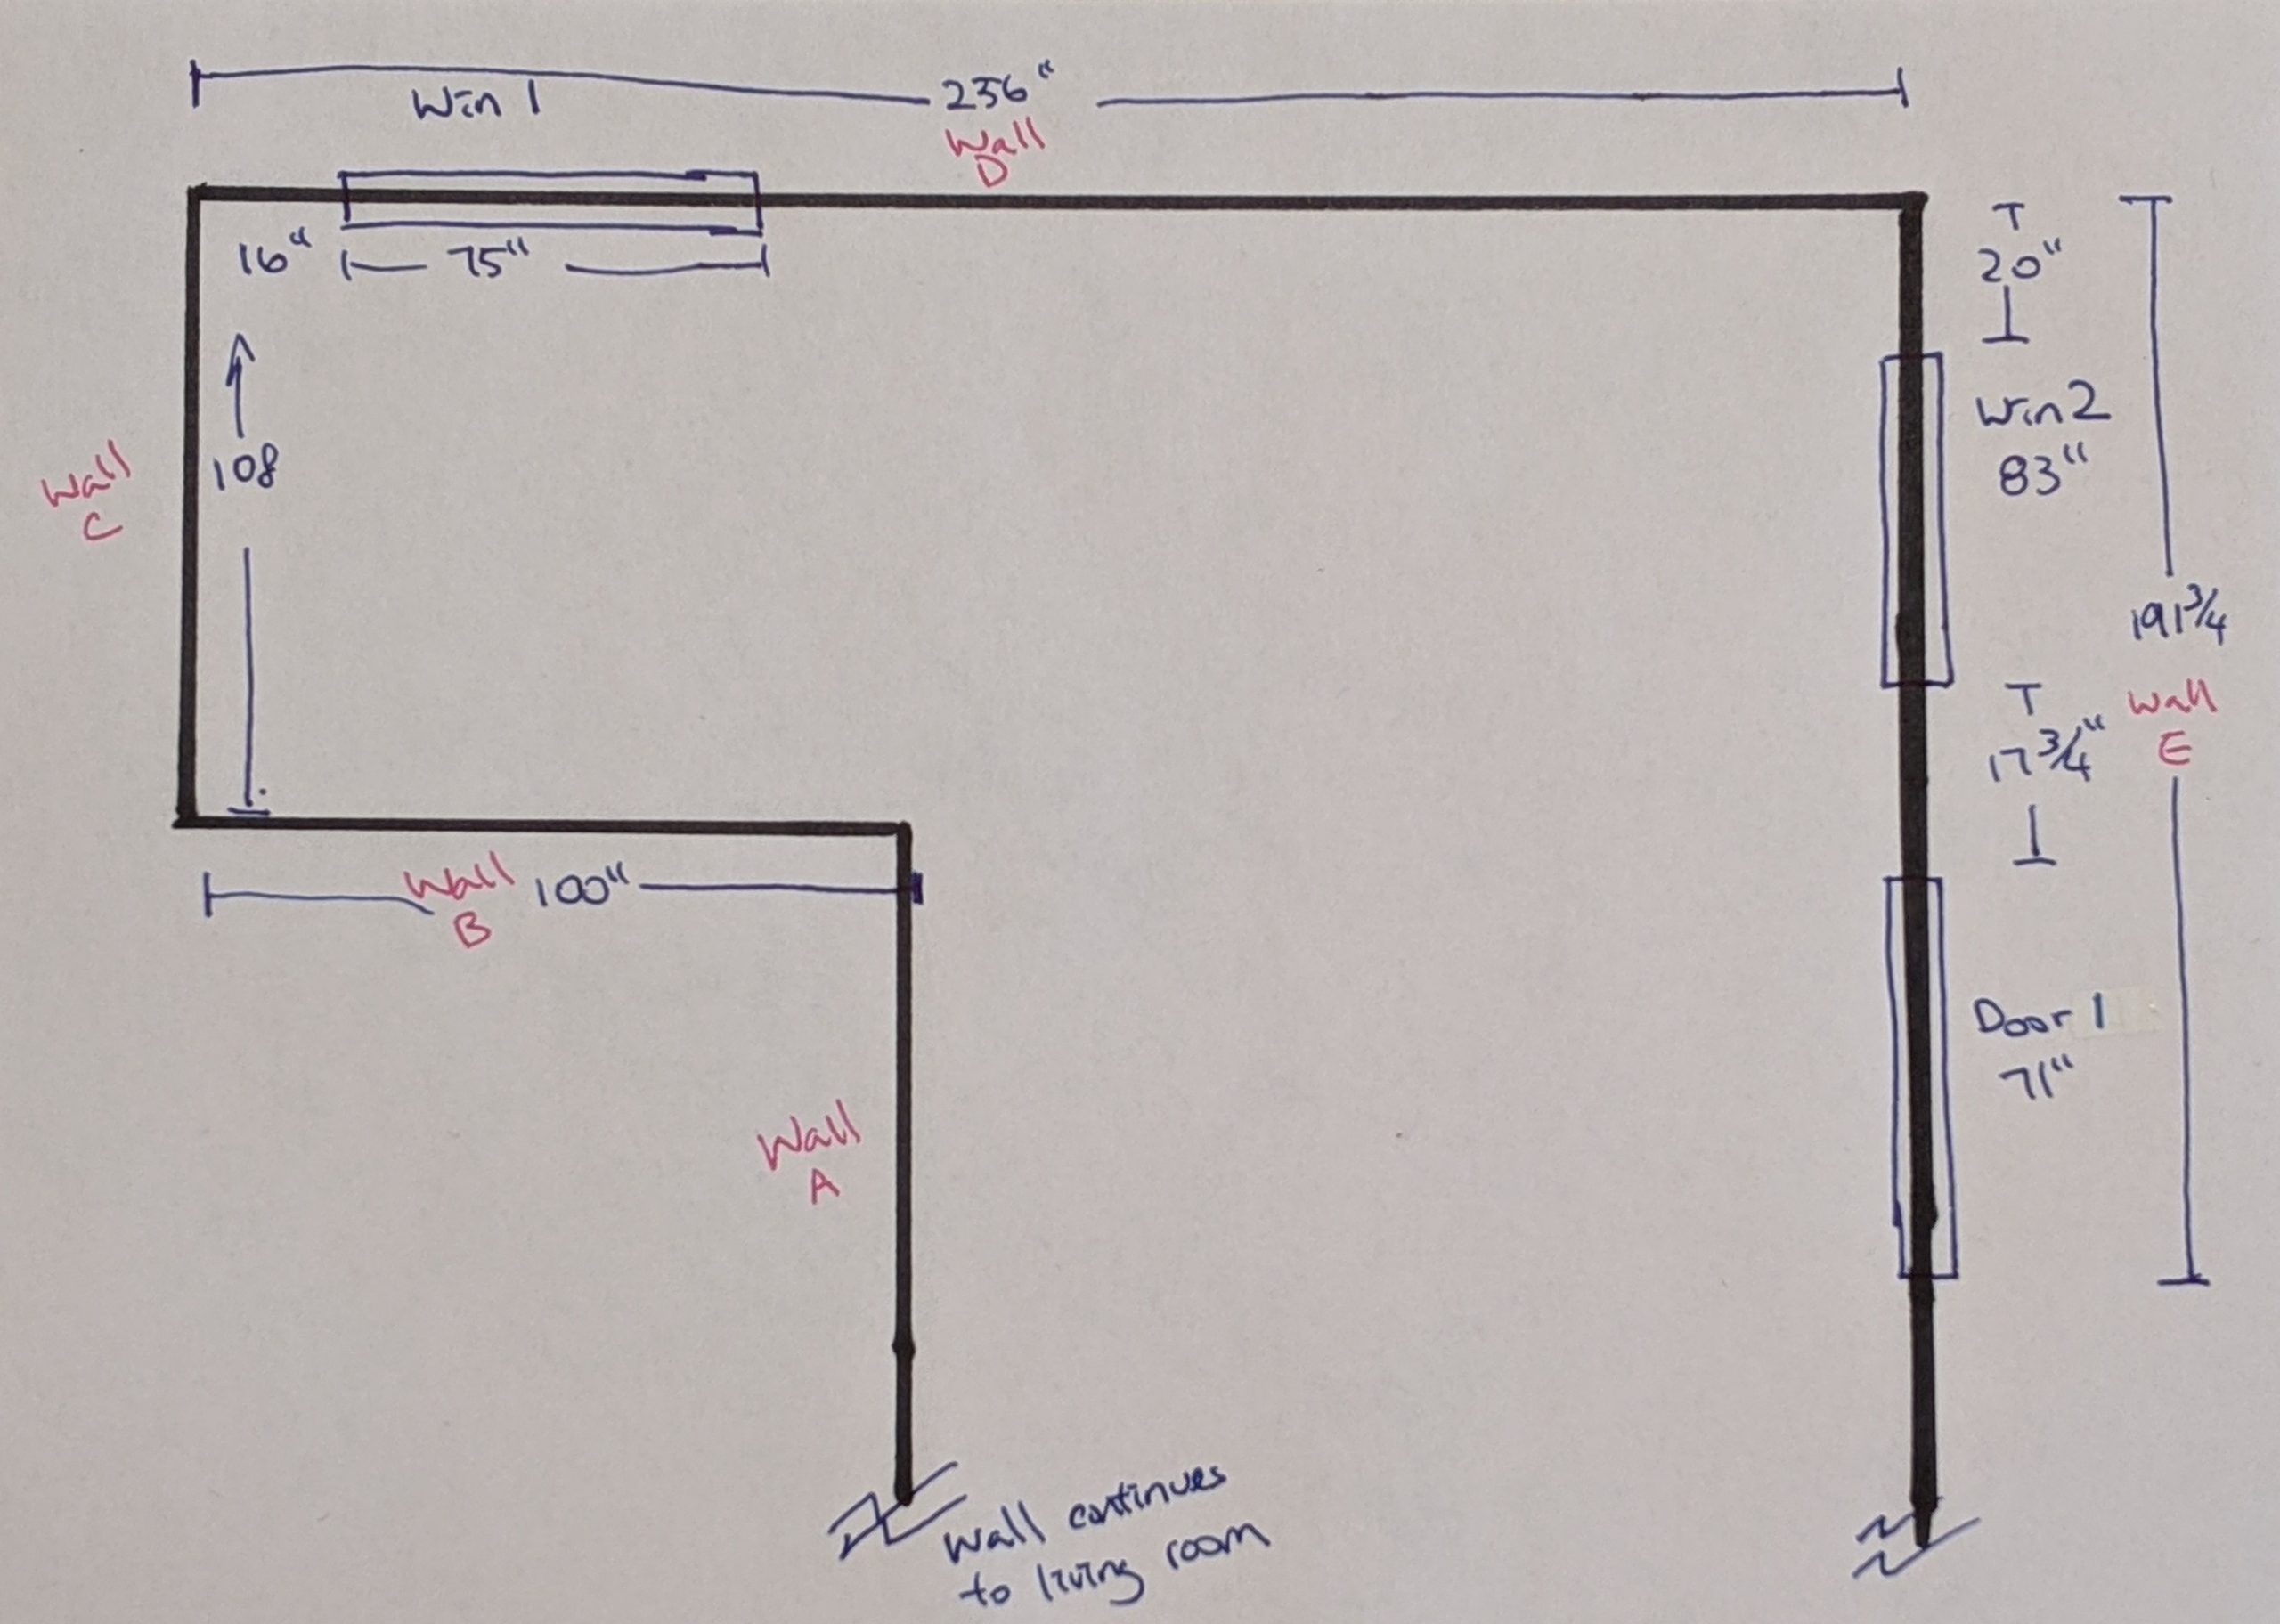
Many of the homes here in the Bay Area have 8ft high ceilings, but some have soffits (fake drop down ceilings, usually for vent pipes, etc.), or have taller ceilings. So please remember to put down the ceiling height as well.
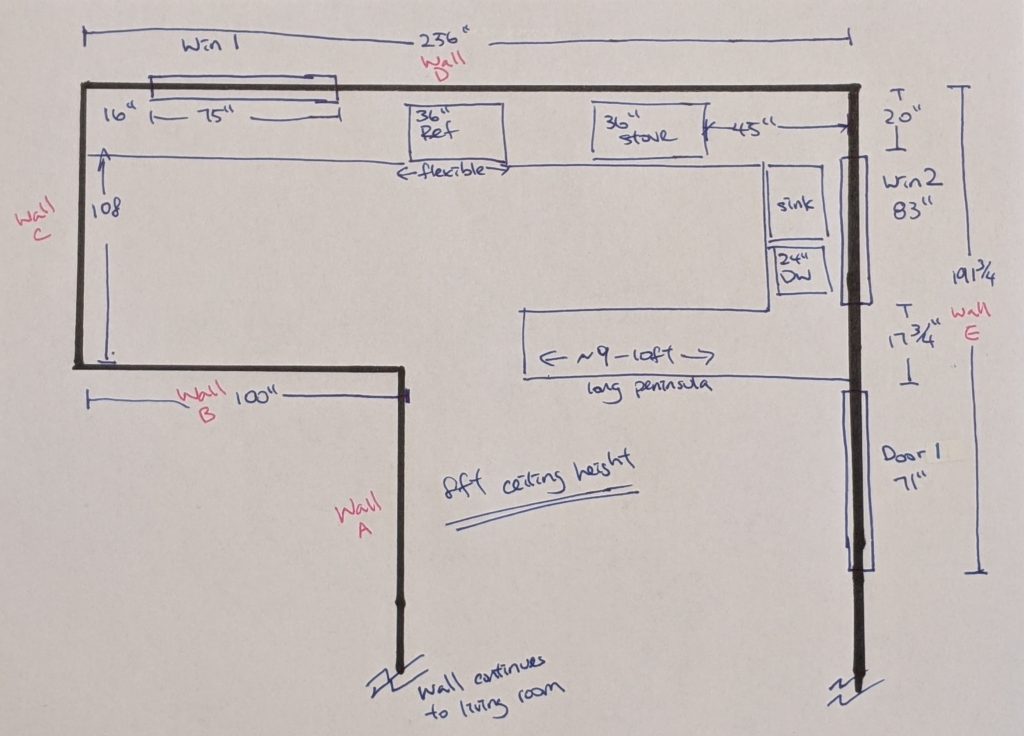
If the appliances will stay in the same space, please note where they are now, and how big they are. Otherwise, please let us know what is flexible for change.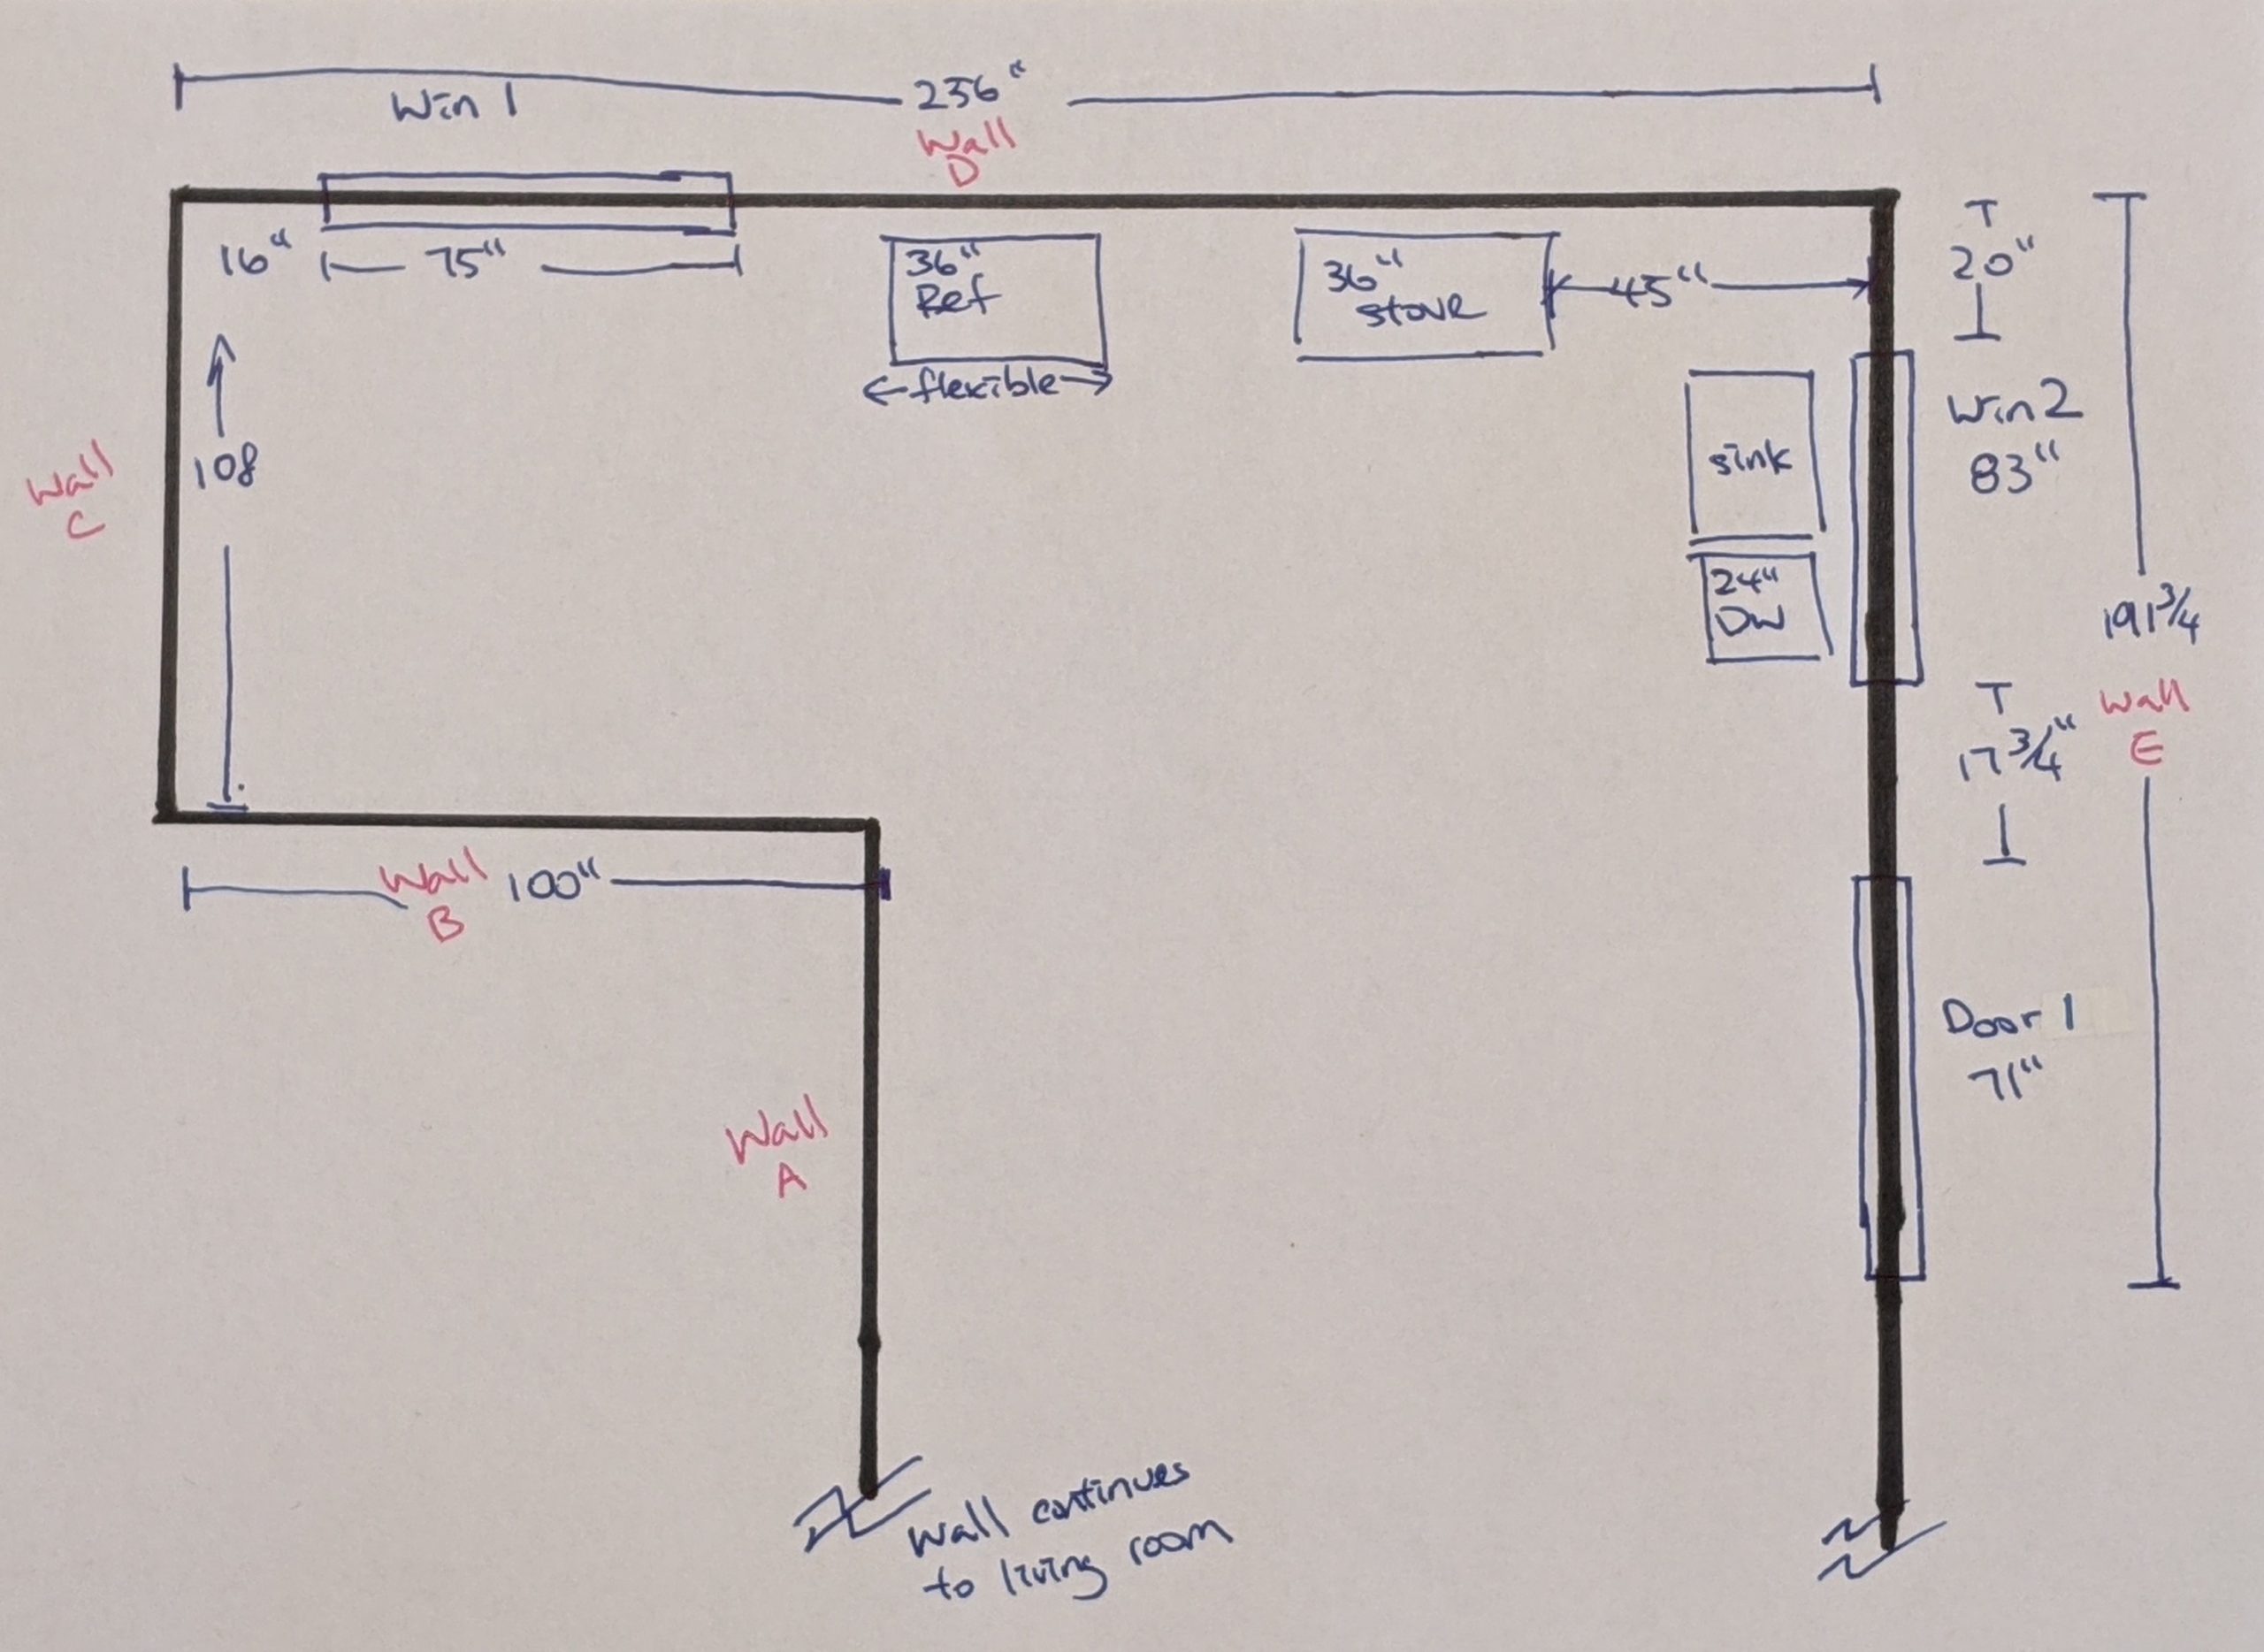
Depending on the scale of your remodel, and how much of the existing layout remains, here are a few common obstacles to be aware of. For example, exposed ceiling beams, light fixtures, HVAC vents, curtain rods, etc. These can be in the way of our planning and cabinet layout.
This helps provide context of the existing space for us, and also serves to cross check against measurements. Of course, this would only apply to folks who are remodeling, if you are building a new house, please skip this step.
If you wish to indicate a change in ceiling or window heights, or perhaps your room has exposed beams that you’d like to indicate, an elevation plan can be helpful. An elevation view is a frontal view of a wall displayed in 2D. Below is an elevation of Wall D from our example above. This particular window is worth noting because it is mounted at a lower height than usual. The bottom of this window is mounted at 34″, which is lower than the standard countertop height of 36″. So if cabinets are desired for underneath this window, we would order a special height for this area.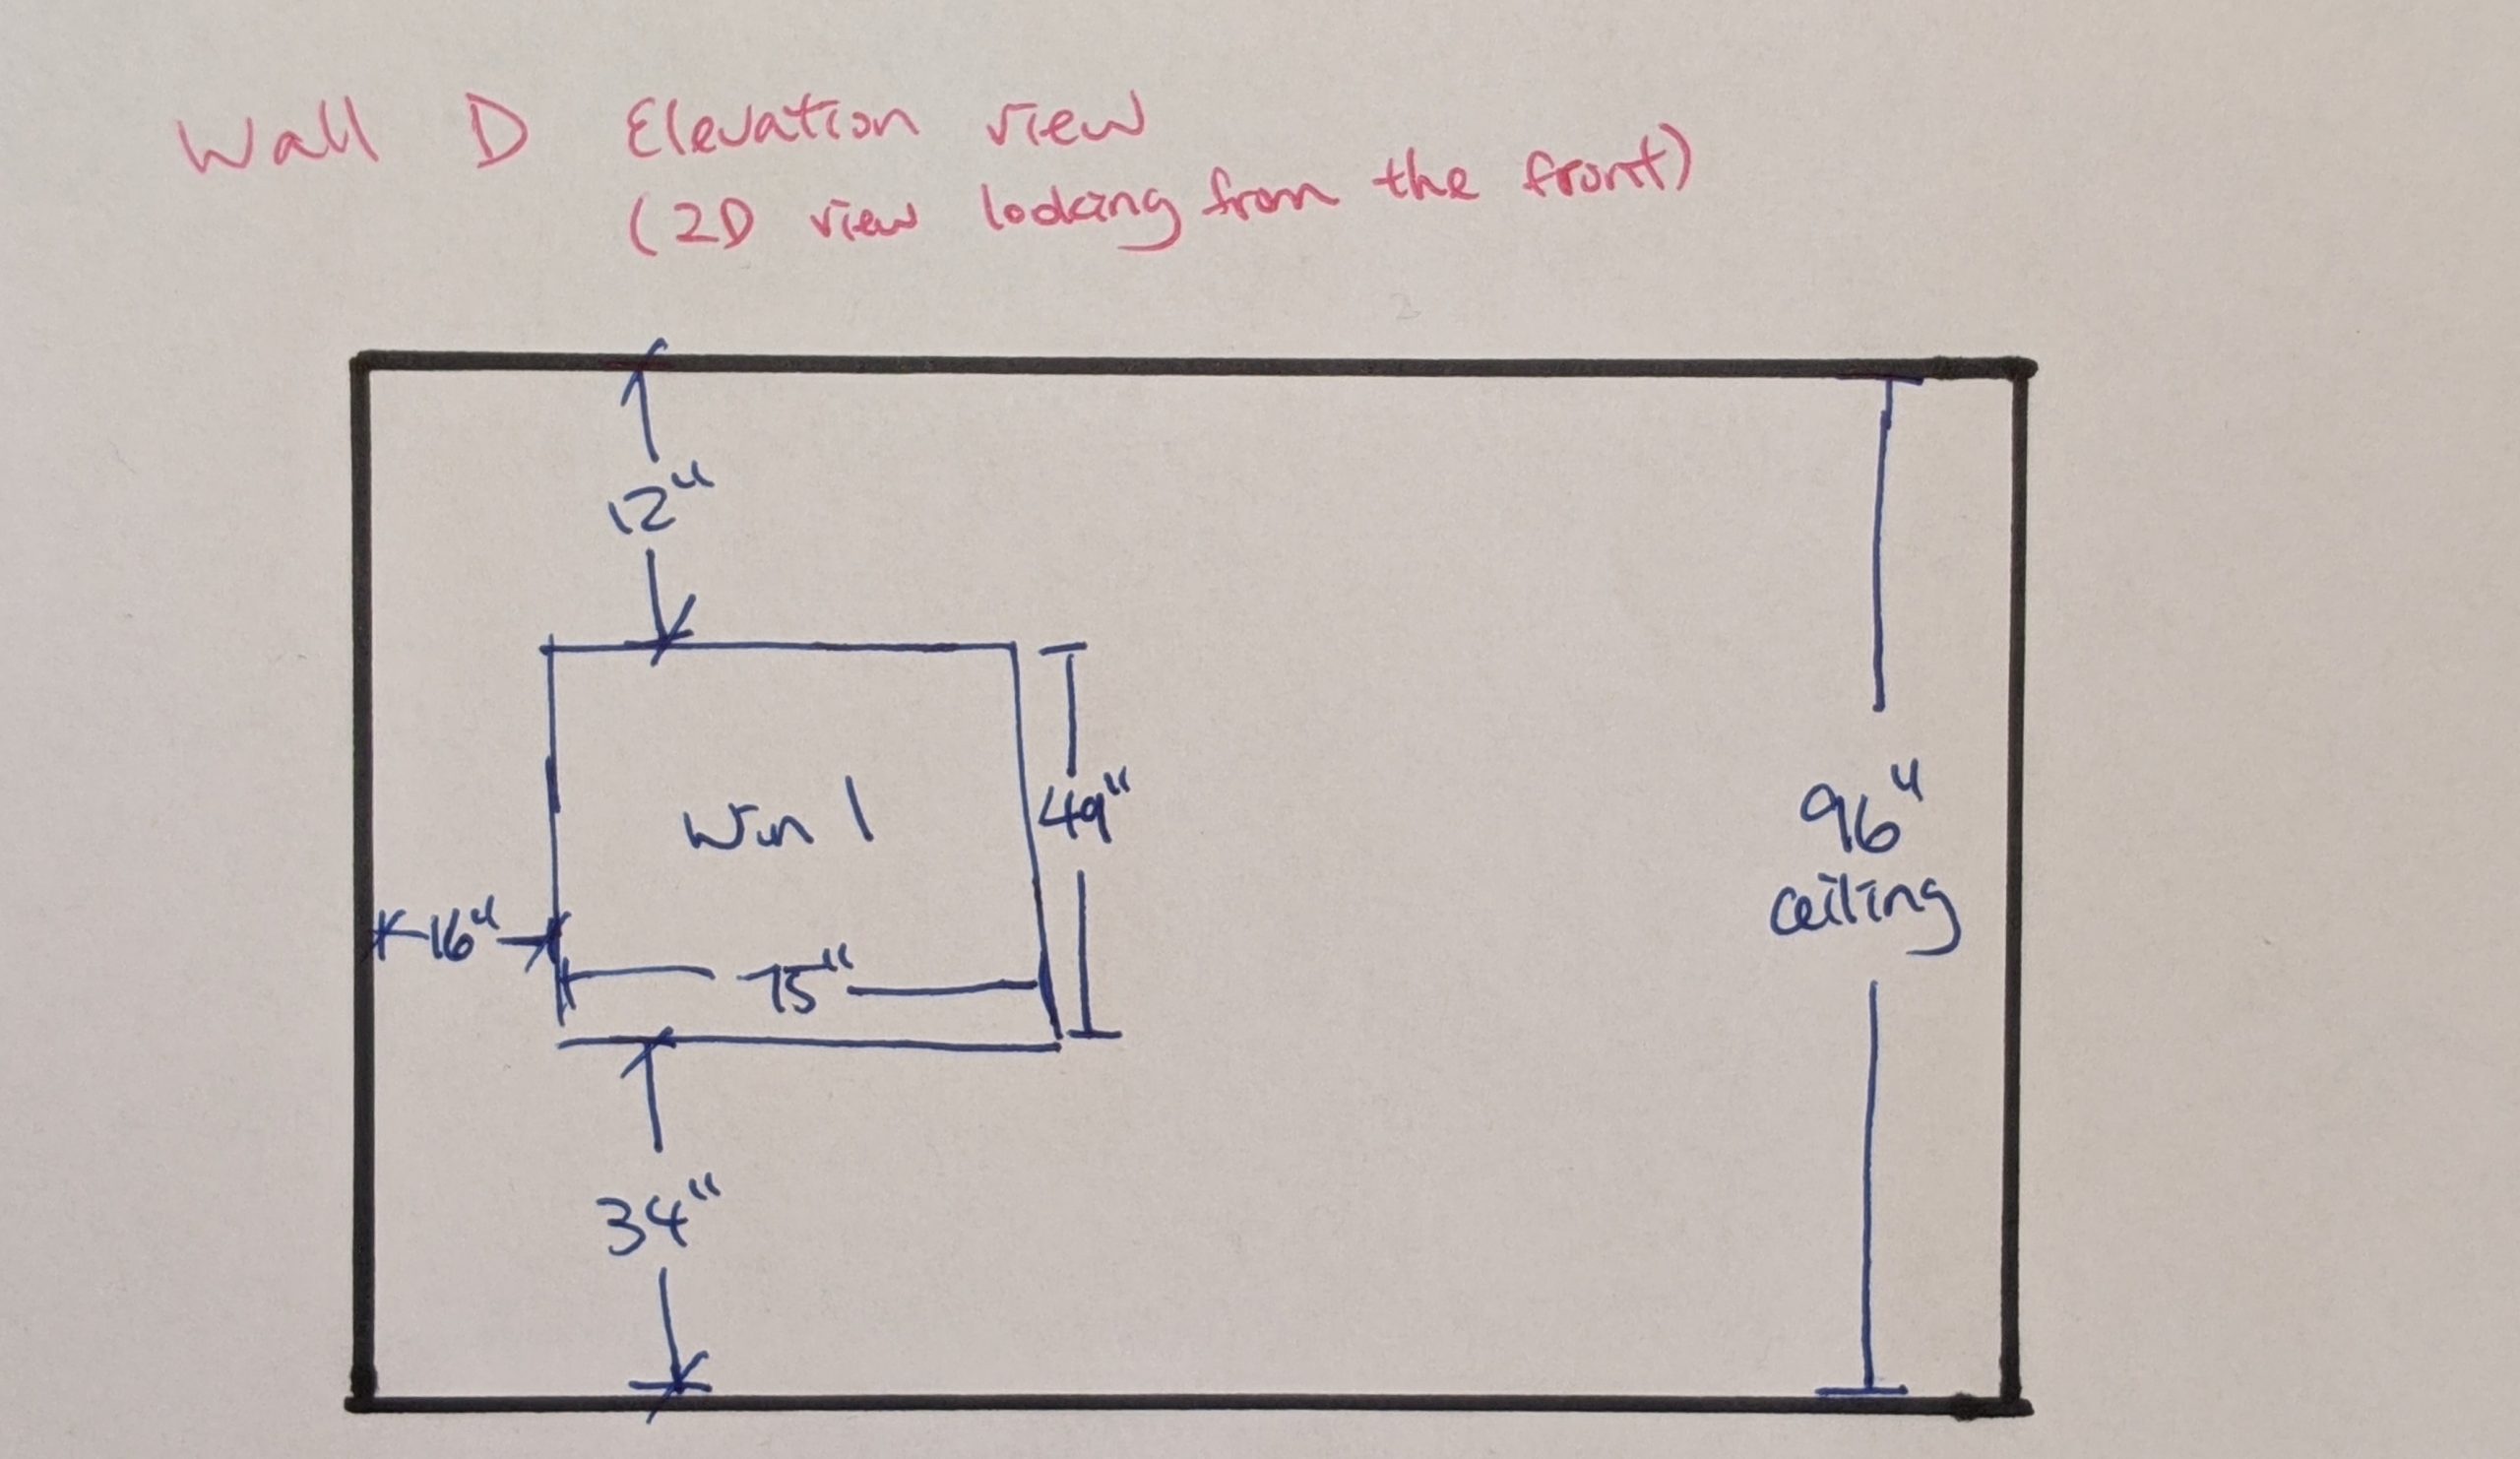
Great job, now that you have finished the floor plan, it should look something like this. Last step, send it over to us so we can begin the work! This will provide us with enough information to start the ballpark or the drawings. Don’t worry if it isn’t 100% accurate, we still measure everything ourselves before we order any cabinets. But this will get get the ball rolling if the plans are at least 80-90% accurate. 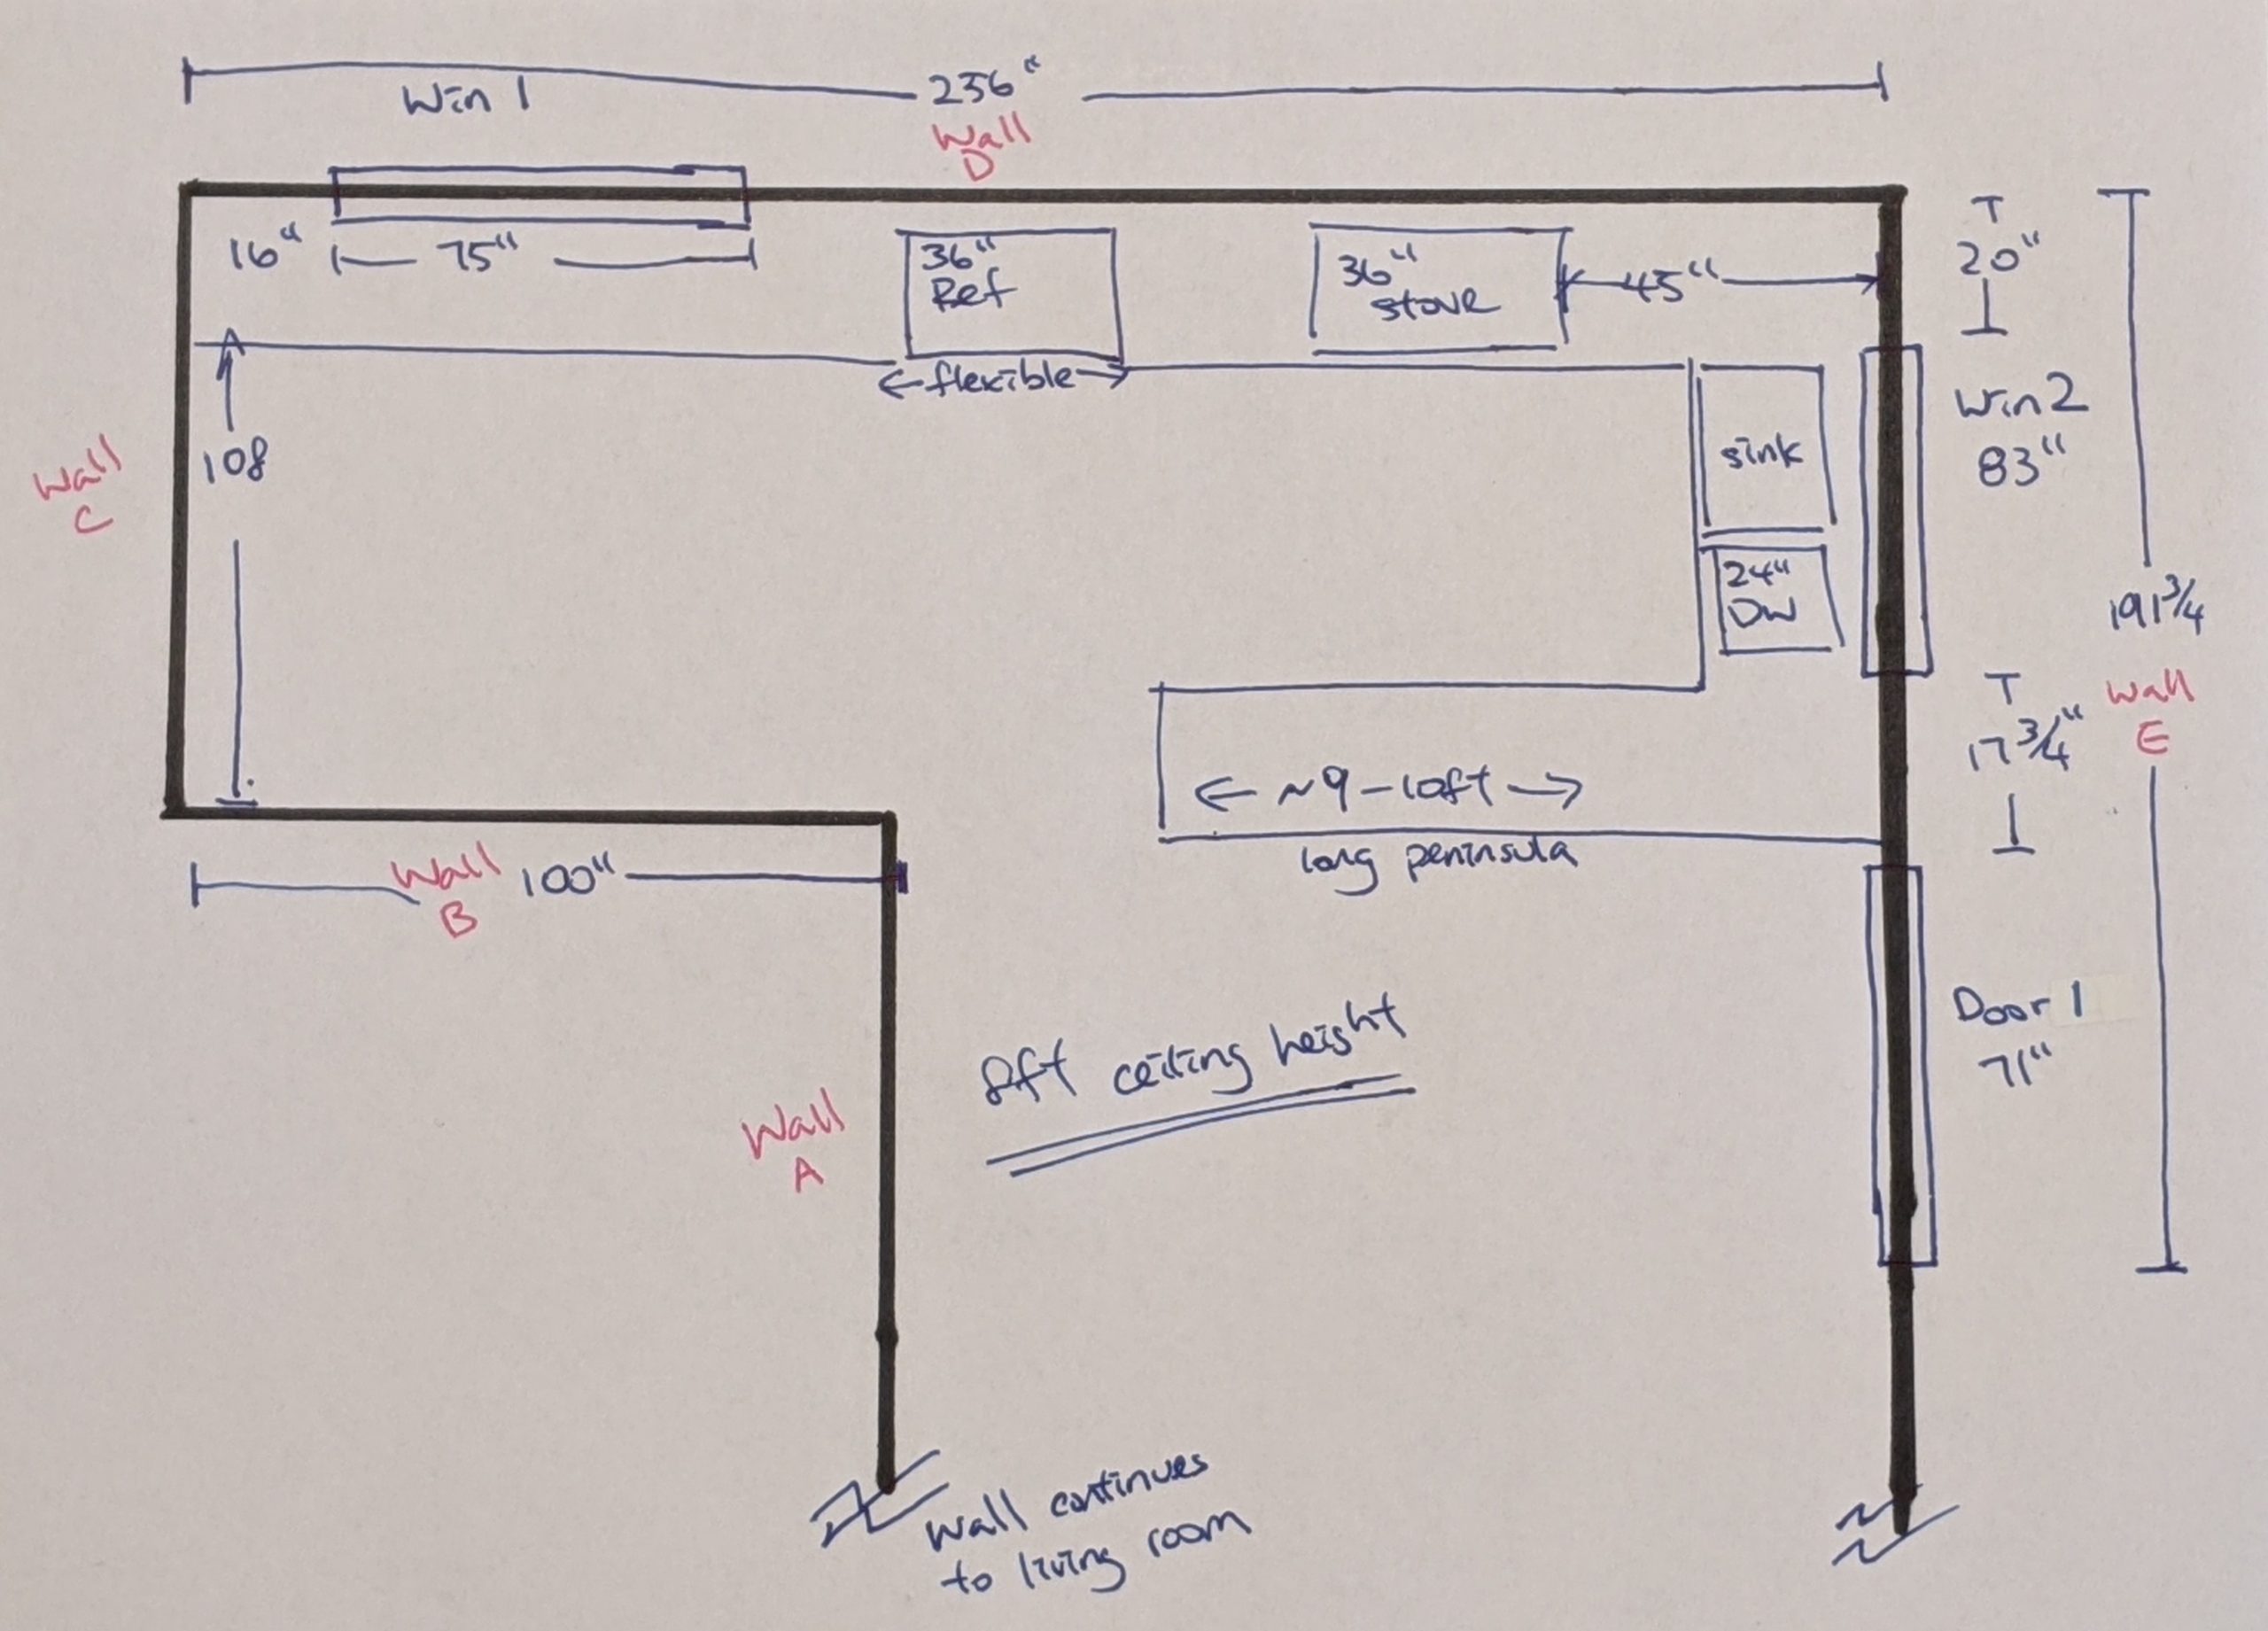
For your convenience, we made a video on how to measure and sketch a floor plan. This information will be helpful not only for our cabinet planning purpose, but also help get the ball rolling when when communicating with other vendors and contractors regarding your remodel.
